User Manual

Table of Contents
Introduction
Welcome to the Tobygard Cages End User Manual. This comprehensive guide is designed to provide veterinarians, veterinary technicians, and clinic staff with the necessary information to operate and maintain Tobygard Cages effectively.
Purpose of the Manual
The primary purpose of this manual is to ensure users have a clear understanding of Tobygard Veterinary Cages’ features, functionality, and proper usage. It serves as a valuable resource by offering step-by-step instructions, safety guidelines, and troubleshooting information.
Overview of Tobygard Veterinary Cages
This manual is specifically crafted for the installers, veterinarians, veterinary technicians, and veterinary clinic owners and staff who are responsible for the installation and maintenance of Tobygard Veterinary Cages.
Safety Precautions
To make the most of this manual, users are encouraged to follow the structured layout of the document. Begin with the “Introduction” for an overview of the manual’s purpose and intended audience. Proceed through each section sequentially for a thorough understanding of Tobygard Veterinary Cages, from setup to maintenance. In case of any queries or issues, refer to the “Contact Information for Support” section for assistance. Thank you for choosing Tobygard Veterinary Cages. We trust this manual will serve as a valuable companion in optimizing the performance of these advanced veterinary cages.
General Safety Guidelines
Welcome to the Tobygard Cages End User Manual. This comprehensive guide is designed to provide veterinarians, veterinary technicians, and clinic staff with the necessary information to install and maintain Tobygard Cages effectively.
Personal Protective Equipment (PPE)
Prioritize safety by wearing appropriate PPE during installation. This includes eye protection, ear protection, protective gloves, and metatarsal/foot protection. Failure to wear PPE could result in serious injury.
Specific Safety Measures for Installation
This manual is specifically crafted for veterinarians, veterinary technicians, and veterinary clinic owners and staff who are responsible for the operation and maintenance of Tobygard Veterinary Cages. Whether you are a seasoned professional or new to veterinary cage systems, this manual aims to provide comprehensive guidance to enhance your experience with the equipment.
Before You Begin
To make the most of this manual, users are encouraged to follow the structured layout of the document. Begin with the “Introduction” for an overview of the manual’s purpose and intended audience. Proceed through each section sequentially for a thorough understanding of Tobygard Veterinary Cages, from setup and operation to maintenance and troubleshooting.
Unpacking and Inspection
Shipment Inventory
Upon receipt of your Tobgygard Cages shipment, it is essential to conduct a thorough inventory and inspection to ensure all components are present and undamaged. Follow these steps:
1. Unpacking
Carefully unpack the shipment to avoid any potential damage to the contents.
2. Inventory Check
Compare the packing list provided with the shipment to ensure that all parts and components listed are accounted for.
3. Visual Inspection
Examine each component for any signs of damage that may have occurred during shipping.
4. Reference Figures
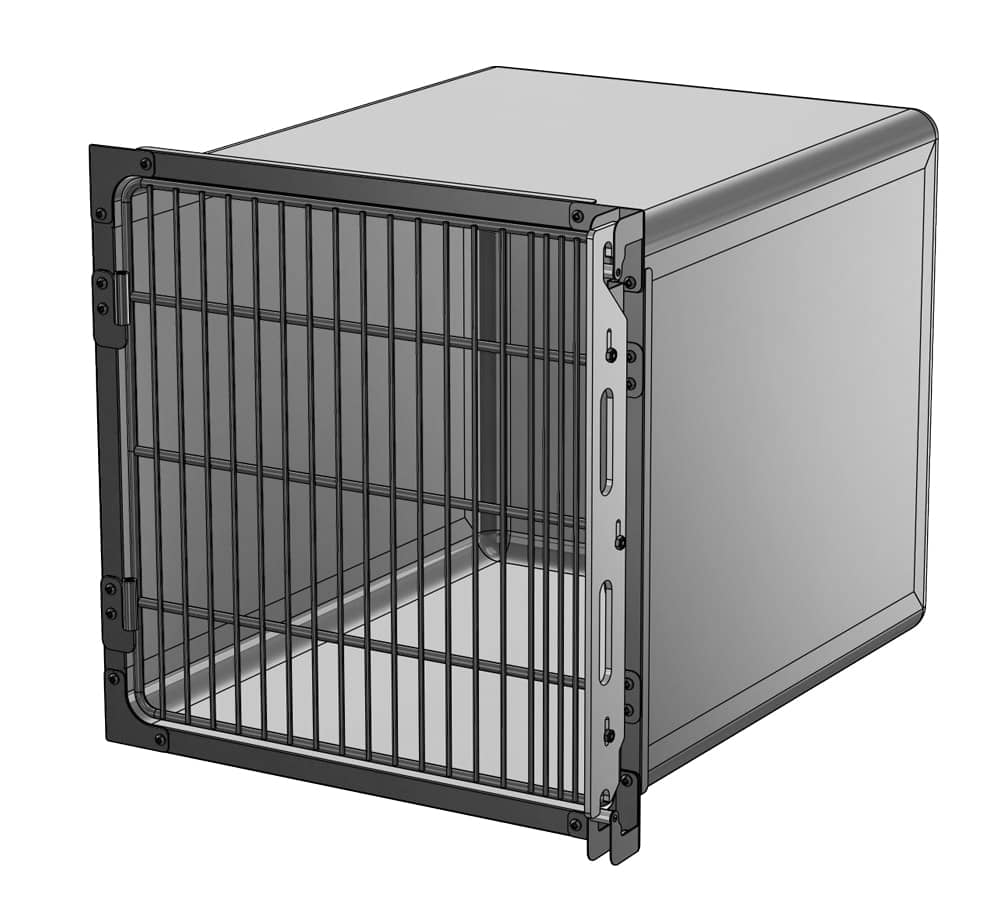
Utilize the provided figure below to identify parts.

Type 3 Hinge
Cage Door
Latch
Shipment Inspection
During the inventory check, it is crucial to inspect each component for any damages. Follow these steps:
- Pre-Acceptance Inspection: Conduct the inspection before signing for the receipt and acceptance of the shipment.
- Damage Assessment: If any components appear to be damaged, follow the established procedures for reporting and handling damaged goods.
Cage Bank Parts List
Upon receipt of your Tobgygard Cages shipment, it is essential to conduct a thorough inventory and inspection to ensure all components are present and undamaged.

Cage Bank Assembly - Trim Plates Parts List

Cross cage finishing set
(250-1106601)

T-cage finishing set
(250-1106602)

T-cage finishing set covers V-H
(250-1106603)

L-cage fixation set

Cross fixation

U Assembly 30″

U Assembly 24″
Cage Bank End & Top Panels - Parts List

Corner finishing panel
(250-3082001)

Front support plate

Back support plate
Cage Bank Configurations
Stainless Steel Cage Options
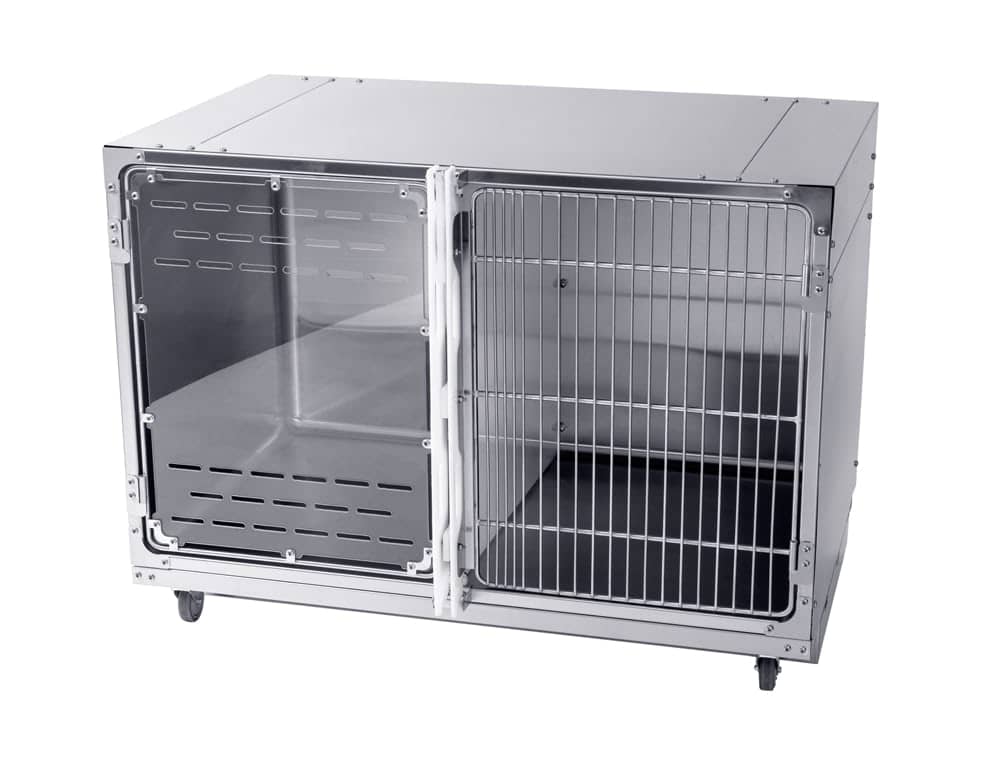
Tobgygard offers stainless steel cages in various sizes, providing flexibility for different facility needs. These cages can be utilized individually or combined with others to create diverse cage bank configurations, accommodating multiple sizes of cages.
Safe Lifting Practices
Stainless steel cages are heavy. Always enlist assistance and adhere to safe lifting practices during assembly, installation, and equipment movement to prevent injuries.
Safety Precautions
Personal Protective Equipment (PPE): Prioritize safety by wearing appropriate PPE during installation. This includes eye protection, ear protection, protective gloves, and metatarsal/foot protection. Failure to wear PPE could result in serious injury.
Assembly Tools
Ensure you have the necessary tools for assembly:
- #3 Phillips Head Screwdriver
- 1/2" wrench (or crescent wrench)
- Rubber Mallet
- Snap Blade Utility Knife
- Level
Note: Avoid using power tools for any procedures outlined in this manual to prevent scratching product surfaces or causing hardware failure. Additionally, do not over-tighten hardware during assembly.
Cage Platforms
Regardless of whether you’re assembling a single cage or a multi-cage configuration, a platform base is essential. Tobgygard offers three platform base options:
Stationary and Mobile Steel Platforms: These platforms provide stability and mobility, respectively, depending on your facility’s needs.
Custom Built Platforms: Alternatively, custom-built platforms can be constructed and used as a cage bank platform to accommodate specific requirements.
Important Considerations
Platform Sizes: Tobgygard offers several standard platform sizes to choose from. Ensure that the selected platform size can adequately support the cage bank configuration.
Safe Cage Bank Lengths: Plan cage bank configurations with safe assembly and maneuverability in mind. Keep lengths manageable to prevent tipping, especially for mobile banks, and ensure safe navigation on uneven flooring.
Assembly Location: For stationary platforms, assemble them at the proposed final location to avoid unnecessary movement and ensure stability.
Wood Base Platform Assembly
Site-Built Wood Frame Base
To construct a sturdy and stable base for your cage arrangement, follow these guidelines:
Lumber Specifications
- Utilize 2 x 4 lumber set on edge to build the base.
- Ensure that the base is at least 29 inches (73.66 cm) from front to rear to provide ample support.
Front and Rear Supports
- The front and rear supports should span the width of the cage arrangement and run parallel to each other.
- Construct the rear support by nailing together two 2 x 4’s for added strength.
- The front support should consist of a single 2 x 4.
Crossmembers
- Include 2 x 4 crossmembers at each end of the base.
- Install intermittent 2 x 4 crossmembers spaced no more than 4 feet (1.22 meters) apart along the length of the base for added stability.
Leveling
- Ensure that the top of the base is level both front-to-rear and left-to-right to provide a stable foundation for the cage arrangement.

Mobile Platform
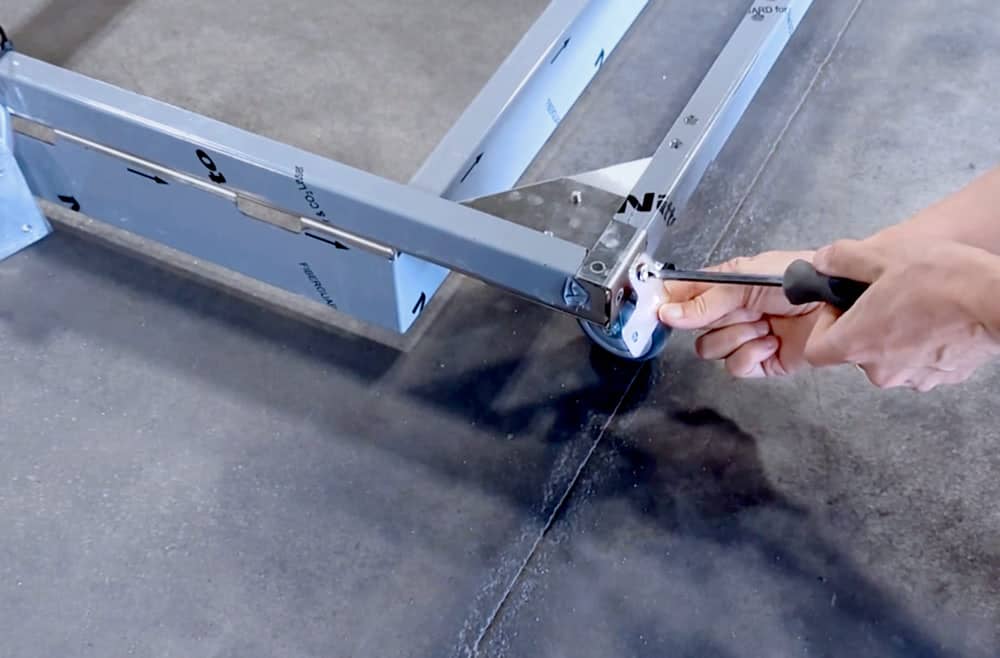
These platforms use casters with foot-operated brakes and raise the cage bank 8.5″ AFF (Above Finished Floor).
Precautions: Ensure safe lifting practices and keep hands clear of potential pinch areas during assembly to prevent minor to moderate injuries.

Cage Bank Assembly
Platform Preparation
Before beginning the assembly process, ensure that the cage bank platform is assembled and leveled at its proposed final location. Follow these steps for the bottom row assembly
If the platform is equipped with casters, lock them once the platform is positioned and leveled to prevent movement.
Warning: Cage bank assemblies are heavy. Minimize moving a fully assembled cage bank to prevent accidents.
Bottom Row, single door cage

- Step 1 : Remove the trim plates parts attached to the mobile base.
- Step 2 : Remove the screws from the L-cage finishing set on the corner of the mobile base.

- Step 3 : Remove the screws from the trim plate of the exterior bottom corner of the cage.

- Step 4 : Lift and place the first cage into position on the platform by placing the lip of the cage on the front of the angle square on the corner of the platform.

- Step 5 : Screw the trim plate back in place to secure the cage to the platform. Install the bottom trim plate using the screws removed in the previous step. Ensure not to fully tighten the screws at this stage.


- Step 6 : Repeat steps 1 to 5 for the other corner.
- Step 7 : Remove the trim plate of the top corner between the cages and install the T-cage finishing set (if this is your last row). If not, proceed to the next step.


- Step 8 : Remove the trim plate of the bottom corner between the cages and install the T-cage finishing set (same as step 8, but for the bottom).
- Step 9 : Ensure the first row of cages is level.
Bottom Row, double door cage

- Step 1 : Remove the trim plates parts attached to the mobile base.
- Step 2 : Remove the screws from the L-cage finishing set on the corner of the mobile base.

- Step 3 : Remove the screws from the trim plate of the exterior bottom corner of the cage.

- Step 4 : Lift and place the first cage into position on the platform by placing the lip of the cage on the front of the angle square on the corner of the platform.
- Step 5 : Screw the trim plate back in place to secure the cage to the platform. Install the bottom trim plate using the screws removed in the previous step. Ensure not to fully tighten the screws at this stage.

- Step 6 : Repeat steps 1 to 5 for the other corner.
- Step 7 : Ensure the first row of cages is level.
Second Row

- Step 1 : Install the U-channel on the bottom of the cage by removing the 3M sticker red pellicule and attaching it to the U-channel already on the cage. Press firmly to ensure the adhesive is secure.

- Step 2 : Lift and place the first cage into position on the first row cage by aligning the lip of the cage with the top of the bottom cage. Repeat this process for all the cages in the second row.

- Step 3 : Remove the trim plate from the top corner of the bottom row of the two exterior cages and install the T-cage finishing set.


- Step 4 : Remove the trim plate in the middle of the cage assembly and install a cross-cage finishing set.


- Step 5 : If this is your last row, remove the trim plate from the top corner between the cages and install the T-cage finishing set (same as step 4 but for the top). If not, proceed to the next step.
Door Opening Change

All doors come standard with a left opening.
- Step 1 : Slide the latch bar up and swing the door to the open position (90° to the cage face).
- Step 2 : Lift the door up, sliding the bushings out of the hinge assembly. Set the door aside away from the assembly area.

- Step 3: Unscrew the top and bottom locks on the right side of the cage.

- Step 4: Remove the trim plates from the left side of the cage and install them on the right side of the cage.

- Step 5: Install the top and bottom locks on the left side of the cage.

- Step 6: Remove the two plates from the right side of the cage and reinstall them on the left side.
- Step 7: Remove the two hinges of the cage door from the left side of the cage and install them on the right side, ensuring the attachment is placed toward the interior of the cage.

- Step 8: Unscrew the door latch and reinstall it in the opposite direction by placing the latch opening at the top of the cage and the opening toward the interior of the cage. Do not tighten the screw too hard, as it may prevent the door latch from moving.

- Step 9: Reinstall the door in place.
Cage Bank End & Top Panels

Safety Warning: Stainless steel cages have sharp edges. Avoid touching exposed steel to prevent serious injury or death. When removing the vinyl film, apply consistent pressure to avoid creasing or bending the panel.
End and top panels are essential components of the cage bank assembly, available in standard sizes that correspond with standard cage sizes. Follow these instructions for the installation of standard end and top panels on a single (double door) cage mounted to a stationary platform:
Finishing panels components:
- 2 sides panels
- 1 top panel
- 2 corners panels
For each panel:
- 2 U channels
- 2 front flat plates
- 6 screws
Platform Preparation
Ensure that the cage bank is assembled and leveled at its proposed final location. Minimize moving the cage bank due to its weight.
End Panels
Start by installing one end panel.

- Step 1 : The 3 bent sides of the panel should be positioned at the bottom of the cage bank, the top of the cage bank, and the back of the cage. The flat side should face the front of the cage assembly.

- Step 2 : Install the 2 front flat plates on the flat side of the panel, ensuring the curved side is positioned towards the panel.

- Install the flat plate on the top front of the panel by securing only the bottom screw, allowing the flat plate to slightly extend beyond the panel. It will be fixed to the corner panel later.

- Install the flat plate on the bottom front of the panel according to the holes on the panel. The flat plate should not extend beyond the panel.

- Step 3 : Screw the U channels to the back of the panel, with the opening side facing the front of the cage.

- Install the U channel on the top back of the panel by securing only the bottom screw, allowing the U channel to slightly extend beyond the panel. It will be fixed to the corner panel later.

- Install the U channel on the top back of the panel by securing only the bottom screw, allowing the U channel to slightly extend beyond the panel. It will be fixed to the corner panel later.

- Step 4 : Install the U-channel in the middle of the cage by removing the red backing from the 3M adhesive. Press firmly to ensure the adhesive is secure. This will provide support for the finishing panel.

- Step 5 : install the finishing panel on the cage by removing the backing from the adhesive on the other side and pressing it into place.
- Step 6 : Screw the panel in place and apply pressure on the U channels to secure the panel to the cage.
- Step 7 : Proceed with steps 1 to 6 (except for step 4) for the corner panel.
- Step 8 : Proceed with steps 1 to 6 for the top panel.
- Step 9 : Proceed with steps 1 to 6 (except for step 4) for the corner panel.
- Step 10 : Proceed with steps 1 to 6 for the side panel.

Insulation
To enhance animal comfort, you can insulate your cage arrangement using blue Styrofoam sheets measuring 1 inch by 24 inches. Follow these steps for insulation:
Insulation Placement
Insulate each tier of cages before installing the next higher tier. Apply the insulation across the top and both sides of the cages, as shown below.

Damage Reporting
In the event of damaged components, take the following steps:
Contact Information: Refer to Tobgygard’s Damage and Freight Procedures for specific instructions.
Immediate Action: Contact Tobgygard Customer Service promptly to expedite the process of replacements or repairs.
Configuration Assistance: For assistance with cage bank configurations and assembly, contact Tobgygard’s sales representatives for detailed drawings.
Lorem ipsum dolor sit amet.
Lorem ipsum dolor sit amet.
Lorem ipsum dolor sit amet.